Showing posts with label Projects. Show all posts

Thursday, 8 September 2011

On The Brain


We are busy busy busy busy bees (how many times can we make this joke?). Our knit installation for Supercrawl has been taking up all of our time for the past couple of weeks. Knit knit knit knit knit knit knit. We'll finally be installing the whole thing tomorrow, and it will be available to view tomorrow evening at the art crawl and all day Saturday at Supercrawl on the facade of The Brain at 199 James Street North.

Over 70 knit scarves, 2 knit window boxes, a knit sign for The Brain, half a dozen crocheted flowers, 18 constructed wood frames later and we're ready. It's going to be incredible. We do hope that you'll be able to check it out. It couldn't have been possible without the local crafting community stepping up and pitching in. Thank you from the bottom of our hearts.

Okay. Back to knitting for us. See you this weekend.

Friday, 12 August 2011

Worker Bees

Well, today is the day that we Bees have been waiting for. Seven months of planning come to fruition starting tonight, and continue along on Saturday. We're thrilled, nervous and a little overwhelmed. Mostly thrilled. Very, very thrilled.

We've done our best the past couple of weeks to showcase some of the amazing talent that make up the fair. Never in our wildest dreams did we expect to be working alongside such creative and accomplished artists. Initially, we had our fingers crossed that we would get enough applications that The Old Friendship Shop wouldn't look empty. And suddenly, there we were, with more applications than we had room to accommodate. This fair is just bursting with extraordinary talent.

We wanted to contribute something material as well. Although the actual logistics alone of this whole event took up most of our time, we felt we had to create some kind of souvenir of our achievement. So we added a couple of more projects to our plate.


Jenna and Thea spent the beginning of this week screen printing tote bags. It's been mentioned on the blog before, but we all really love our wreath logo. Jenna did such a beautiful job designing it. Really, it'd be a shame NOT to print the design onto totes. Jenna and Thea printed up a limited number for the fair - more once we all realized that all 11 of us would like one ourselves - in a beautiful mustard colour onto sturdy canvas bags. In my head, I've already designated mine for transporting my Knit Night supplies on Wednesday nights.


During our last social meeting, most of the Bees got together and had a good old fashioned button making party. We spent a couple of hours in Roisin's new studio cutting out designs in different colours and sizes, pressing them into buttons and eating scones. I'm so thankful that most of our meetings revolve around good food, as well as learning new skills and good conversation. And gosh, our buttons turned out so cute.


Without getting too sappy here, we wouldn't have been able to pull this off without all the support of so many other worker bees. We have countless friends and family members and partners who have donated their time, their houses, their skills and their love to make all of our projects possible. Big, huge, bottom of our heart thanks to Kieran, Jeff, Peter, Dane, Kevin, Mike, Erick, Jesse, Doug, Sean, Ted, Gary, Copydog Tom, Tim, Heather, Rachael, Amanda, Ella, Dave, The Brain, Mulberry Street Coffeehouse, all of our families, all of our vendors, everyone who applied and especially to you. Thanks for being interested in what we do.

We really hope that you'll join us this weekend. We've worked so hard. For you.

Wednesday, 13 July 2011

Hip to be Square: Granny Square Blanket!

Way back in the winter our fellow bee Courtney was kind (and patient!) enough to teach a few of us how to crochet simple granny squares at The Brain's regular Knit Night. In general I tend to gravitate towards simple projects that I can pick up and put down easily or do while watching a movie; it makes me feel like I'm being productive! Granny squares were the perfect project to fill my idle hands and use up that ever growing yarn stash. Slowly but surely, one square at a time, you're bound to build up enough little squares to make an afghan without having to tote around a large and daunting project.


Jenna Rose used some gorgeous light airy colors for her granny squares (above).

I love natural colors of wool and using Canadian or hand spun yarns, so for my project I used up some hand spun Manos del Uruguay left over from an old project and purchased some Briggs and Little yarn while on christmas vacation in Nova Scotia. I love Briggs and Little because it's a Canadian company and is very inexpensive for pure Canadian wool, which they buy direct from the producer. It makes an ideal yarn for natural dyeing as well as for large projects like blankets.

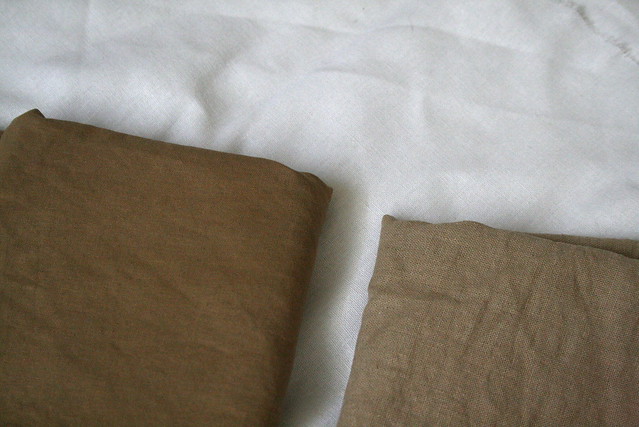
I started by dyeing some of the wool with onion skins, one of the easiest and most rewarding natural dyes to work with. After saving up my onion skins until i had enough to fill a pot, I dyed two balls of natural white "Heritage" (2 ply) yarn from the Briggs and Little line. I boiled the onion skins 'til the water was full of their dark rust color, then I filtered them out and placed the water back on to boil. I dyed one skein first which soaked up the strong darker yellow right away - the ball in the back of the picture below. Then I dyed the second skein in the remaining water - this is called an exhaust bath. The water is not as potent with dye but this second round will produce a softer, often more beautiful, shade of yellow.


To go with the natural yellows, I picked up some Heritage yarns in shades of grey and started making the granny squares that Courtney had taught me. The stitch was surprisingly simple. Starting with a small circle made with a few chain stitches and then working outwards with little "shells" of three double-crochet stitches followed by a few chain stitches you eventually get a square. There are many great books and videos on making granny squares and tons of variations of patterns but I thought I'd stick to the simple square, mixing up my colors to make every square just a little bit different from the last. Soon enough (and thanks to a couple seasons of "Mad Men" that I definitely needed to catch up on...) I had a big pile of granny squares ready to be stitched together into a blanket.


As I made up the squares I added in some bright fun bits of left over wool in my stash to fill out the blanket and add some different colors!

Using the same basic pattern of three double crochet stitches I edged each square, and stitched them together by picking up the edge of the previous square as I went. When I was all done I edged the whole blanket with a gradation of grey to black yarns to frame the whole thing making the lighter grays and yellows pop in the middle of the blanket.

And just in time for summer weather, voila! the perfect picnic blanket for Bay Front Park!


I think I'll spend my whole summer right here.


photos by Jenna Rose and Anna Taylor

Tuesday, 22 March 2011

Pysanky!


Last Monday evening Hollie was kind enough to welcome us around the harvest table in her lovely home to try our hand at traditional egg decorating. Since I was a kid, Easter has been my favorite holiday. There's very little pressure, it comes with spring AND there's chocolate...what's not to love! With spring - and a late Easter, for those inclined - around the corner, eggs were on our brains and had us thinking of the very impressive craft of pysanky (pih-SAHN-kee). Traditionally, Ukrainian woman would create effortless-looking decorative eggs by drawing resists in beeswax on the surface of eggs and successively dipping them into various dyes, layering intricate pattern over intricate pattern. While some of us remembered childhood attempts at this or similar egg dyeing crafts, none of us really knew what we were doing at all. And let us tell you...it's hard! We were not as instantly expert at this as we thought we would be, but it was a lot of fun!

The endeavor began with a trip to The Ukrainian Store in Dundas. When you go in it's hard not to get distracted by all the fresh locally made specialty foods, after all, they boast the "best perogies in town"...a statement that has since been tested by Beehive members and met with much satisfaction. The owners were extremely friendly, fully stocked in every thing we needed and willing to patiently translate the directions on the bright packages of dye.

The supplies needed were candles, dyes, beeswax and kistkas (KIST-kuh - a simple stylus made from a cone of metal fastened to a small wooden dowel with wire). The Ukrainian store has a variety of sizes of kistkas that produce different thickness of line with the beeswax. They even supply electric ones for the expert hand! Dyes can also be made naturally using plants and vegetables like beets. We gathered onion skins to make a yellow dye using just the same method as for fabric dye.


The Hamilton Public Library was full of beautiful books on the subject, and proved invaluable for inspiration.


We mixed the dyes according to instructions and laid out everything we needed to get started. each of us had a little candle in front of us and our egg to decorate. Some times you can blow out the yoke in your egg ahead of time or - as per tradition - leave it to slowly dry out over a few years.

You start by heating the metal part of your kistka until you can easily scoop out a little beeswax, filling the larger open end. With further heating, the wax should run down into the cone, getting ready flow out onto the egg's surface. I found I had to heat my tool often to keep the wax flowing and TOO often we would heat it too much and a large flow of wax would blob out the end of our tool, muddying our attempts at perfect designs! We had to ditch our pride and realize that straight lines and symmetry come with years of practice.


Where the wax is drawn on a resist was made on the egg so that those areas were left white when we dipped them into our first dyes. After you take it out and pat it dry you can add more wax before dipping the egg in a second color, and so on. Wherever the wax has been put on, the last color dyed will stay resisted until the end. We worked from light colors to dark ones. When we finished, we gently scraped or melted off the wax resists revealing all the bright colors we had captured in our squiggly patterns!

I think we were SUPPOSED to be having a meeting too...but I'm not sure we ever got round to discussing anything.

Some of us have since become addicted to the beautiful end results of this craft, and this week for Knit Night we left our needles and hooks at home and filled a whole table with dyes and candles and set to work on some more eggs. I love our folksy (albeit a bit wonky) attempts!


Photos courtesy of Hollie

Sunday, 13 March 2011

Our Roots, Part III: Natural Dyeing

In addition to pickling and knitting, a number of us Beehive members are also interested in natural dyeing. It is a joy to see the beautiful range of colours you can produce using only natural materials.

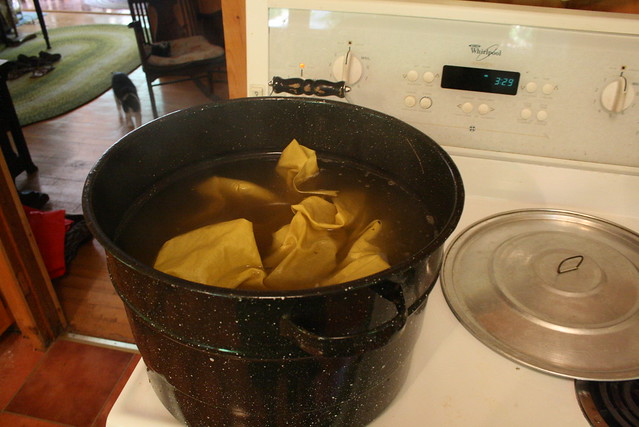
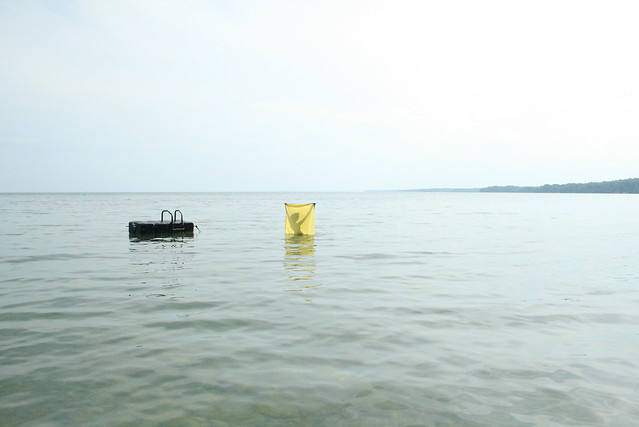
One of my first experiments with natural dyeing was done using golden rod up at my cottage this past summer. Let's just say that having access to a lake is a huge plus! When you get hot and sweaty from letting your plant matter and fabric boil on the stove, you can do the washing out part of the process in the lake while you go for a dip!

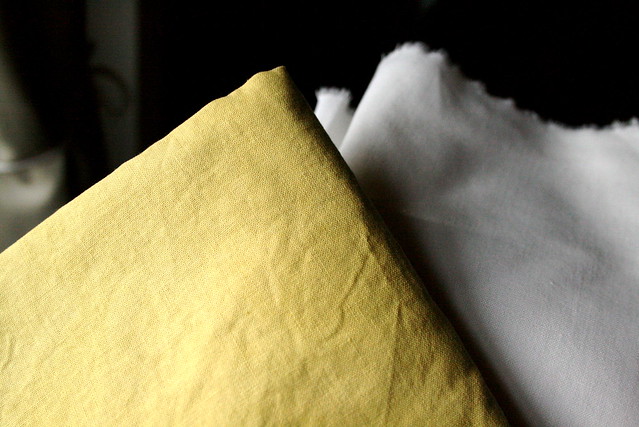
The goldenrod produced a beautiful yellow.

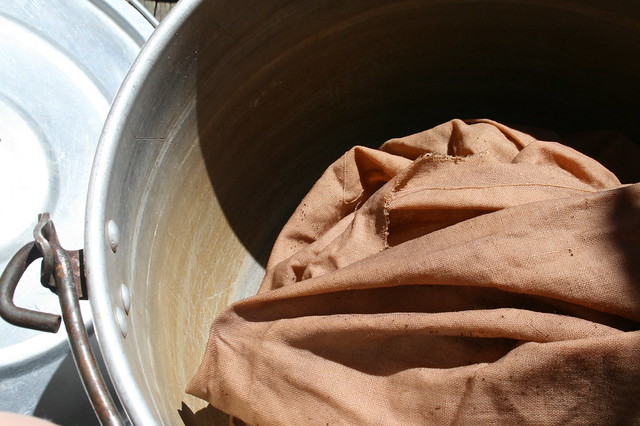
Sumac was my next solo experiment. It produced a lovely brown, but be warned: I think some sort of insect has a tendency to lay it's eggs in sumac. So you might find a whole ton of tiny larvae in your pot when boiling the plant. Kind of gross.

Our first group dyeing session occurred at Thea's house this past fall. I brought some walnuts I'd collected, and Thea supplied cochineal. She got the cochineal from Maiwa, a company located in BC that has a great selection of natural dyes and everything else you need for natural dyeing. And in case you didn't know, cochineal is an insect that lives on the prickly pear cactus that is native to Mexico and some other Central and South American countries. It's ground into a really fine powder for use in dyeing. While it may not be local, it is highly coveted because it produces absolutely gorgeous shades of pink.

We had a lovely time, and our results were great! The pinks and browns that we produced ranged in tone quite a bit, depending on the material that was dyed (protein fibres such as wool pick up dye better than cellulose fibres such as cotton), and whether they were dyed in the first or second use of the dye bath. Using a mordant (like alum, iron, or tannic acid) can also alter and help set the colour.


Anna, a knit night regular, also decided to try her hand at dyeing. She used onion skins to dye some wool yarn, and got lovely results!

We are certainly looking forward to planning some more natural dye days as the weather gets warmer. There's an endless number of materials out in nature that can be used for dyeing, so there's no limit to our experimenting with them.

Photos courtesy of Kate, Hollie, and Anna

Monday, 28 February 2011

Our Roots, Part I: Summer Pickle Bees


To help you become better acquainted with the Beehive Craft Collective, over the next few weeks we will be telling you our story - starting with some of the common interests and activities that first drew us together. Many of us Bees share an interest in food - eating, cooking, baking, and waxing poetic over it. This includes finding enjoyment in growing the food ourselves. Some of us, like me, were born in the vegetable patch, and grew up close to our food. For others, local food has become an important part of our lives, and who can imagine a source nearer than the bean you pick with your own hands? For the last couple of years, through the generosity our friend Gary Buttrum and his family, some of us have been lucky enough to have the chance to grown our own. You will no doubt hear more about the farm as you get to know us, but to read more about it, please see Hollie and Jane's reports of farming adventures. This last summer, we found ourselves with an over-abundance of beans, cucumbers and zucchini. There is something quite satisfying in rising from picking row upon row of beans with a full bushel basket of waxy yellow beauties. Yet, after the end of the picking session finds you with more beans than can be eaten fresh and taken to market, what to do?


Why, have a pickling party, of course! Many hands make light work. Many of us pickle and preserve on our own, but we had so many vegetables, and also wanted to share the pickling bounty with our non-pickling farm friends. So Hollie and I gathered together a group of like-minded ladies, and last year we had two pickling parties, which we have come to call Pickle Bees. A working 'Bee' is a gathering of peers to accomplish a task, making social and enjoyable what otherwise might be a tedious chore. I think this is the perfect description of our bees.


The Pickle Bees were also an easy way to try an untested recipe. We'd never tried making dilled beans or relish, and ending up with one or two jars of a new pickle is much better than been stuck with six jars of an unloved preserve. In the end, all the recipes turned out great, and were delicious. Together we ended up with dozens of jars of dill pickles, dill beans and zucchini relish. We shared the jars amongst the the Pickle Bee attendees, and gave the remaining jars to our farming friends.


This year I look forward to a spring and summer of planting, weeding (that's a lie, as I detest weeding), harvesting, and marketing, but what I most relish is the cooking, pickling, preserving, jamming and baking, and the eating, of course. It will be an even more delicious season in the company of wonderful friends.  

Photos courtesy of Jesse Senko, Hollie and Kate

Thursday, 24 February 2011

Ta Da!


Why, hello there! We are finally here! "We" are the Beehive Craft Collective, and boy, are we ever glad to be able to share our endeavour with everyone. We've been bursting at the seams trying to keep somewhat quiet about this for the past couple of weeks. Get it? Seams? Textile joke...

We formed at the beginning of 2011, and hit the ground running immediately. An exciting and fulfilling and fresh project for a new year. Not just one of us, but multiple ladies have expressed their desire to be a part of something like this for their entire lives. And now we are. So we wasted no time and began to hold meetings and start organizing and planning all the logistics of our very first summer craft fair, to be held in conjuncture with the James Street North Art Crawl this coming August. Lots to do, lots to do.


Note-taking and books on needlepoint and coffee filter poufs and floorplans, oh my!

The process for holding a craft fair at times holds tedious tasks like finding a location, and figuring out how many vendors will fit, and inquiring about insurance and accessibility and determining costs. But we're an enthusiastic and capable bunch of ladies pursuing our combined dream, so it's not really work. It's like we're all floating along on cloud 9 the entire time.

We're totally more excited for creating the decor, and coming up with ideas for gift bags and planning the party that will coincide with the Friday night portion of the show though, to be perfectly honest.


We also get pretty excited about delicious treats and beautiful backdrops. Our next order of business was to move our weekly meetings from an ordinary boardroom to the stunning Mulberry Street Coffeehouse, now a fixture in beautiful Hamilton, Ontario, where we are all currently based out of. An inspiring location for an inspiring project. And we hope to somehow work with Mulberry Street for the fair.

We've still got months of planning ahead of us, to take us from winter to spring to wonderful summer, and we could not be more excited. We'd be so thrilled if you joined us for the ride. We're just so very pleased to make your acquaintance.