Showing posts with label Natural Dying. Show all posts

Friday, 16 December 2011

Quilts! at the Art Gallery of Hamilton

Recently the Beehive was granted the exciting privilege of a private visit to the Art Gallery of Hamilton’s exhibition Quilts! A Gift from Carole and Howard Tanenbaum to the Textile Museum of Canada. As pretty much all of us are textile superfans, we gazed with reverence at the 17 quits on display, marveling at the textures, colours and skilled handwork at play in these Canadian, American and British works dating back to the 1830s.


Though many of their makers are unknown (and were certainly not releasing artist statements!) , the quilts in their distinctiveness inspired us to try to imagine the thought process involved in creating them. Pieced Quilt (1880) for example appears to have no rhyme or reason in the colour placement - the maker seemingly having worked their way through their scrap pile, moving on to one fabric as they ran out of the last. Randomness in this and other quilts through the interruption of pattern (or lack thereof) has very personal and charming effect. Equally charming are the backs of the quilts, which we attempted to sneak peeks at wherever we could and oohed and ahhed at the boro-like patchwork or sweetness of a simple cotton paisley.


Some quilts appear to have been made with a more distinct vision, or boast luxury fabrics such as brocades, printed silks, and patterned velvets. Pieced Quilt with Sawtooth Stars and Diamonds Pattern (1836) is a particularly stunning example of a quilt made with naturally dyed silk (prior to the invention of synthetic dyes 20 years later) and has maintained a rich colour palette of purples, maroons, greens and reds. The crazy quilts - irregular patchwork quilts joined through decorative embroidered borders - incorporate many different luxury fabrics as well pieces of cultural history such as Crazy Quilt in 30 Blocks (1885) which includes a ribbon showing the "Great Bridge - length 5989 feet" aka the Brooklyn Bridge which was completed in 1883.


As the quilts range from having been completed in the 1830s to the 1950s, there is some textile history to be learned in this exhibit as well. While earlier English quilts tended to start with a central medallion then finish with a distinctive border (much like an oriental carpet, as seen in Framed-medallion Quilt (1850)), by the second half of the 19th century, quilters began to structure them as a series of blocks arranged in a grid - making them easier to sew as smaller blocks could be made individually and joined later. This style of quilting is much more common today than the more labour intensive method of assembling the quilt from the centre outward. The topic of labour and time came up frequently amongst us Bees as we tried to imagine how many hours must have been invested and wondered how the makers found the time. In our current age of the instant the amount of time invested in the more complex quilts is almost unfathomable and something to be admired.


Though originally intentioned as functional pieces, the Tanenbaums (skilled art collectors) were clearly drawn to these quilts based on their aesthetic impact and artistry. In placing them on the gallery walls, we are asked to re-examine our relationship to these domestic objects that are so frequently lumped in with the curtains or the welcome mat - to consider them as works of art. These are not simply quilts, they are Quilts!


Quilts! A Gift from Carole and Howard Tanenbaum to the Textile Museum of Canada
On view until January 15, 2012
Art Gallery of Hamilton
123 King Street West | Hamilton ON | L8P 4S8
T: 905-527-6610
E: info@artgalleryofhamilton.com
artgalleryofhamilton.com

Photos by Hollie

Wednesday, 26 October 2011

The Bees at Home: Projects in Progress

Our blog has taken you to the farm, to knit night, and to our planning meetings, but we thought it might be about time to show you some of the crafty things us Bees work on in our spare time. Most of the time, we've all got something (or a few things!) in progress at home, so we're going to start showcasing them on the blog a little bit! Hopefully this will give us more motivation to get these projects finished, and maybe inspire you to start (or finish?) a project you've had on the go as well!

First, Kate is working on an assignment for her program at Sheridan - embroidering a number of fashion related pieces. She's working them into this AMAZING dress she designed, which she'll then have modeled and photographed to create a look-book:

Second, Meg is working on an alphabet crewelwork sampler. Using all the standard stitches, this piece is interesting and enjoyable, and will likely take a while to complete. Every letter is totally different, and the colors are super fun!

Next, our east-coast member, Anna, has been naturally dyeing some silk. The growing seasons in Nova Scotia are a little shorter than in Ontario, so when she moved back there recently she managed to just catch the end of the Goldenrod flowers. Anna dyed a piece of satin silk tied up with shibori knots (see second picture). Anna said that the color was very subtle, but a lovely muted yellow-green came through and with a simple rolled edge it will make an elegant scarf.


Last, Hollie has been working on a quilt! This is her first attempt at one, and she started all the way back in January with the guidance of quilting pro Melanie. Progress was halted due to a busy summer and a finicky old sewing machine. She recently acquired a new-to-her machine for her birthday and has been getting back at it. She chose bright and busy fabric and a simple half-triangle design for her first quilt. She's looking forward to finishing it any day now!

So, there's a little sneak-peek into some of our current projects! If you've posted your progress on a piece you've been tackling, feel free to link to it below, as we'd love to see! Happy crafting!

Wednesday, 13 July 2011

Hip to be Square: Granny Square Blanket!

Way back in the winter our fellow bee Courtney was kind (and patient!) enough to teach a few of us how to crochet simple granny squares at The Brain's regular Knit Night. In general I tend to gravitate towards simple projects that I can pick up and put down easily or do while watching a movie; it makes me feel like I'm being productive! Granny squares were the perfect project to fill my idle hands and use up that ever growing yarn stash. Slowly but surely, one square at a time, you're bound to build up enough little squares to make an afghan without having to tote around a large and daunting project.


Jenna Rose used some gorgeous light airy colors for her granny squares (above).

I love natural colors of wool and using Canadian or hand spun yarns, so for my project I used up some hand spun Manos del Uruguay left over from an old project and purchased some Briggs and Little yarn while on christmas vacation in Nova Scotia. I love Briggs and Little because it's a Canadian company and is very inexpensive for pure Canadian wool, which they buy direct from the producer. It makes an ideal yarn for natural dyeing as well as for large projects like blankets.

I started by dyeing some of the wool with onion skins, one of the easiest and most rewarding natural dyes to work with. After saving up my onion skins until i had enough to fill a pot, I dyed two balls of natural white "Heritage" (2 ply) yarn from the Briggs and Little line. I boiled the onion skins 'til the water was full of their dark rust color, then I filtered them out and placed the water back on to boil. I dyed one skein first which soaked up the strong darker yellow right away - the ball in the back of the picture below. Then I dyed the second skein in the remaining water - this is called an exhaust bath. The water is not as potent with dye but this second round will produce a softer, often more beautiful, shade of yellow.


To go with the natural yellows, I picked up some Heritage yarns in shades of grey and started making the granny squares that Courtney had taught me. The stitch was surprisingly simple. Starting with a small circle made with a few chain stitches and then working outwards with little "shells" of three double-crochet stitches followed by a few chain stitches you eventually get a square. There are many great books and videos on making granny squares and tons of variations of patterns but I thought I'd stick to the simple square, mixing up my colors to make every square just a little bit different from the last. Soon enough (and thanks to a couple seasons of "Mad Men" that I definitely needed to catch up on...) I had a big pile of granny squares ready to be stitched together into a blanket.


As I made up the squares I added in some bright fun bits of left over wool in my stash to fill out the blanket and add some different colors!

Using the same basic pattern of three double crochet stitches I edged each square, and stitched them together by picking up the edge of the previous square as I went. When I was all done I edged the whole blanket with a gradation of grey to black yarns to frame the whole thing making the lighter grays and yellows pop in the middle of the blanket.

And just in time for summer weather, voila! the perfect picnic blanket for Bay Front Park!


I think I'll spend my whole summer right here.


photos by Jenna Rose and Anna Taylor

Tuesday, 5 April 2011

Our Roots, Part IV: The Farm

Two summers ago, a group of us were toying with the idea of starting a shared vegetable garden somewhere in the downtown area. That’s when our good pal Gary stepped in and offered up a much better suggestion: his parent’s farm had an acre of land that we could use, just outside of the city. That summer, The Farm was born.

The Farm belongs to the Buttrums, a family of farmers (and friends) who have been at the Hamilton Farmers’ Market for seven generations, since the 1880’s. Gary’s parents run the farm and sell their produce at the market. Squash, potatoes and tomatoes are their key crops, but they have grown all sorts of vegetables over the years. When they offered us up some of their land, we were beyond thrilled.

The first summer, we cleared the back acre of land up at the farm and planted our crops as quickly as we could. It was already late May by the time we started farming, so we didn’t have a lot of planning time. We started heading up a few days a week to plant seeds, move rocks, weed, weed some more, and finally, harvest. When the harvest came, it was bountiful. It was also a little crazy. Beans sprouted up faster that we could possibly pick them, and by the time the frost came, we probably had about 300 heads of cabbage that we needed to find homes for. Some of the excess went to the Hamilton Farmers’ Market, but even then we still had too much.

With the help of Gary and his parents, we’ve learned a lot about farming since that first summer, and we’re still learning. Last year more friends came up to the farm, and we expanded our farming area to cover the other five acres of farm land owned by the Buttrums. We helped farm their key market crops, and in return we got to use the remaining land for delicious tomatoes, beets, potatoes, hot peppers, onions, carrots, broccoli, cucumbers, zucchini and more.

It’s hard, but rewarding work. Most of the weeding takes place on your hands and knees, so you often leave the farm a little worse for wear. Still, when the weather is nice, or the sun starts setting, I can’t think of a better place to be. It’s so satisfying to grown your own food and know exactly where it came from, and what (if anything) went into it. It’s a rewarding experience to get back to the basics, and become part of something so sustainable.

We don’t use any chemicals at the farm, and even though we prefer it that way, sometimes the crops suffer as a result. Last year these pesky Colorado Potato Beetles pretty much wiped out our supply of potatoes, and most of the tomatoes suffered from a blight. It’s a small price to pay for knowing we are eating natural, pesticide-free food.

Last summer we grew a little of everything you could possibly think of, and we did our very best to minimize any waste. We planted in phases so that not all the crops were ready at once, and we had a steady system of weeding and harvesting going on all summer. We hosted canning parties, made lots of soups and stews, and organized an outdoor market outside of White Elephant during the art crawls. Everyone from the farm volunteered to help harvest & transport the vegetables, and set up the stand outside of the shop. Hollie’s sister Nikki was often the face of the market stand, and she did an amazing job.

This summer we are seriously stepping up with the farm. We have a ton of new friends who are interested in coming up, and we are taking this job seriously. Gary has appointed Hollie as Farm Manager, so we have someone to help organize and keep us all on track. We’re growing new crops, and bringing in something we are all really excited about: BEES. Some new friends are bringing their 3rd generation beekeeper experience to the farm this summer, and we’ll have our very first hives.

We’re also planning to plant a natural dye garden, full of Madder, Indigo, Goldenrod, Hollyhock and more. There’s going to be a 6 x 20 foot natural dye garden, so you can expect lots of Beehive dyeing projects in the future. The weather is just starting to warm up here in Hamilton, and farming has been on everyone’s minds. I can’t wait to get back out there and get started on all the new ideas and projects we have planned, and I’m sure you’ll hear a lot about it this summer on the Beehive blog. Photos courtesy of Jane, Hollie and Gary Buttrum

Tuesday, 22 March 2011

Pysanky!


Last Monday evening Hollie was kind enough to welcome us around the harvest table in her lovely home to try our hand at traditional egg decorating. Since I was a kid, Easter has been my favorite holiday. There's very little pressure, it comes with spring AND there's chocolate...what's not to love! With spring - and a late Easter, for those inclined - around the corner, eggs were on our brains and had us thinking of the very impressive craft of pysanky (pih-SAHN-kee). Traditionally, Ukrainian woman would create effortless-looking decorative eggs by drawing resists in beeswax on the surface of eggs and successively dipping them into various dyes, layering intricate pattern over intricate pattern. While some of us remembered childhood attempts at this or similar egg dyeing crafts, none of us really knew what we were doing at all. And let us tell you...it's hard! We were not as instantly expert at this as we thought we would be, but it was a lot of fun!
The endeavor began with a trip to The Ukrainian Store in Dundas. When you go in it's hard not to get distracted by all the fresh locally made specialty foods, after all, they boast the "best perogies in town"...a statement that has since been tested by Beehive members and met with much satisfaction. The owners were extremely friendly, fully stocked in every thing we needed and willing to patiently translate the directions on the bright packages of dye.

The supplies needed were candles, dyes, beeswax and kistkas (KIST-kuh - a simple stylus made from a cone of metal fastened to a small wooden dowel with wire). The Ukrainian store has a variety of sizes of kistkas that produce different thickness of line with the beeswax. They even supply electric ones for the expert hand! Dyes can also be made naturally using plants and vegetables like beets. We gathered onion skins to make a yellow dye using just the same method as for fabric dye.


The Hamilton Public Library was full of beautiful books on the subject, and proved invaluable for inspiration.


We mixed the dyes according to instructions and laid out everything we needed to get started. each of us had a little candle in front of us and our egg to decorate. Some times you can blow out the yoke in your egg ahead of time or - as per tradition - leave it to slowly dry out over a few years.

You start by heating the metal part of your kistka until you can easily scoop out a little beeswax, filling the larger open end. With further heating, the wax should run down into the cone, getting ready flow out onto the egg's surface. I found I had to heat my tool often to keep the wax flowing and TOO often we would heat it too much and a large flow of wax would blob out the end of our tool, muddying our attempts at perfect designs! We had to ditch our pride and realize that straight lines and symmetry come with years of practice.


Where the wax is drawn on a resist was made on the egg so that those areas were left white when we dipped them into our first dyes. After you take it out and pat it dry you can add more wax before dipping the egg in a second color, and so on. Wherever the wax has been put on, the last color dyed will stay resisted until the end. We worked from light colors to dark ones. When we finished, we gently scraped or melted off the wax resists revealing all the bright colors we had captured in our squiggly patterns!

I think we were SUPPOSED to be having a meeting too...but I'm not sure we ever got round to discussing anything.

Some of us have since become addicted to the beautiful end results of this craft, and this week for Knit Night we left our needles and hooks at home and filled a whole table with dyes and candles and set to work on some more eggs. I love our folksy (albeit a bit wonky) attempts!


Photos courtesy of Hollie
Sunday, 13 March 2011

Our Roots, Part III: Natural Dyeing

In addition to pickling and knitting, a number of us Beehive members are also interested in natural dyeing. It is a joy to see the beautiful range of colours you can produce using only natural materials.
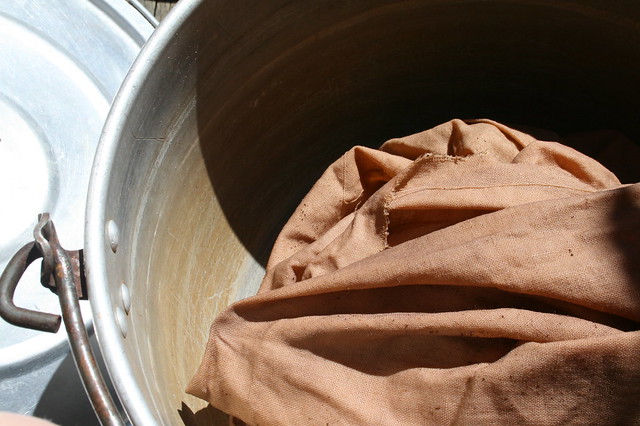
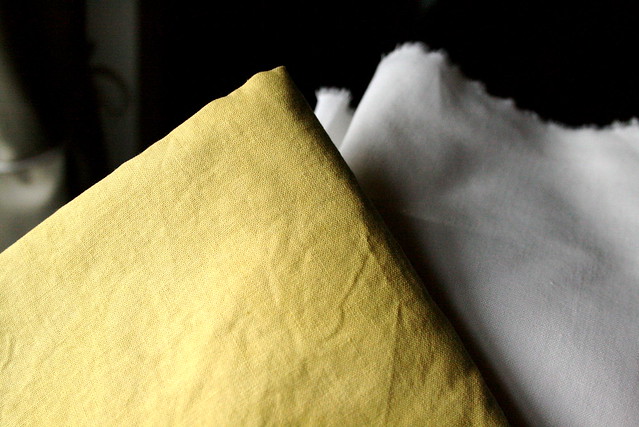
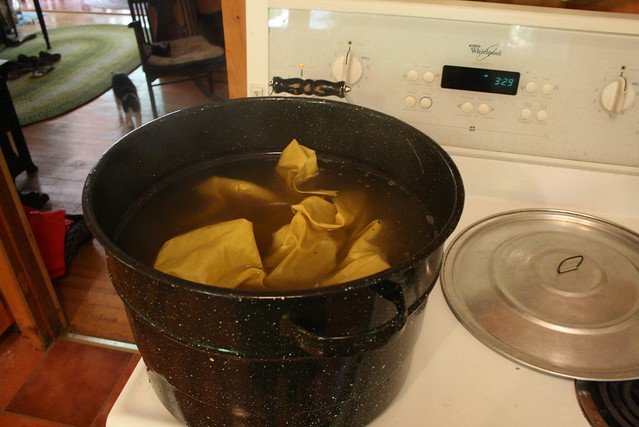
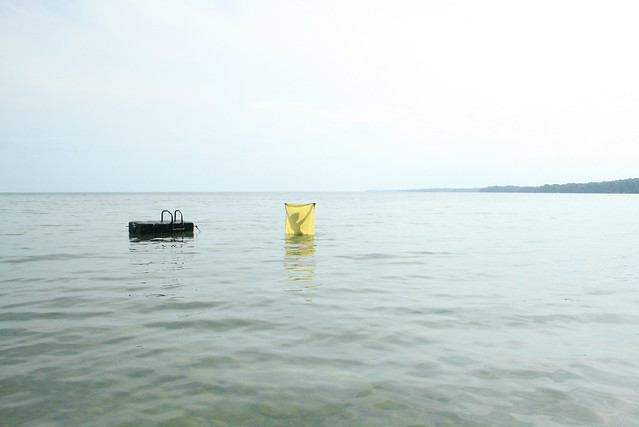
One of my first experiments with natural dyeing was done using golden rod up at my cottage this past summer. Let's just say that having access to a lake is a huge plus! When you get hot and sweaty from letting your plant matter and fabric boil on the stove, you can do the washing out part of the process in the lake while you go for a dip!

The goldenrod produced a beautiful yellow.

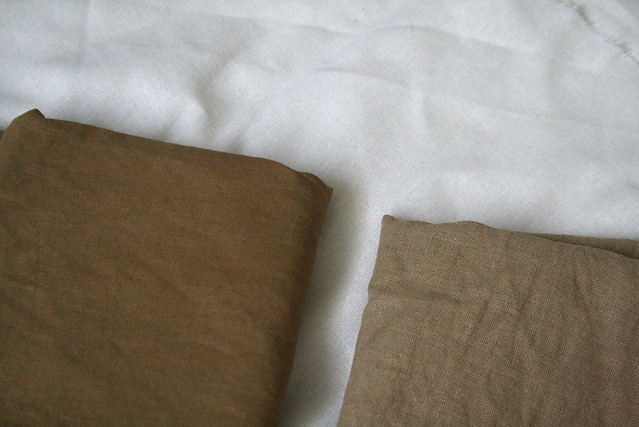
Sumac was my next solo experiment. It produced a lovely brown, but be warned: I think some sort of insect has a tendency to lay it's eggs in sumac. So you might find a whole ton of tiny larvae in your pot when boiling the plant. Kind of gross.

Our first group dyeing session occurred at Thea's house this past fall. I brought some walnuts I'd collected, and Thea supplied cochineal. She got the cochineal from Maiwa, a company located in BC that has a great selection of natural dyes and everything else you need for natural dyeing. And in case you didn't know, cochineal is an insect that lives on the prickly pear cactus that is native to Mexico and some other Central and South American countries. It's ground into a really fine powder for use in dyeing. While it may not be local, it is highly coveted because it produces absolutely gorgeous shades of pink.

We had a lovely time, and our results were great! The pinks and browns that we produced ranged in tone quite a bit, depending on the material that was dyed (protein fibres such as wool pick up dye better than cellulose fibres such as cotton), and whether they were dyed in the first or second use of the dye bath. Using a mordant (like alum, iron, or tannic acid) can also alter and help set the colour.


Anna, a knit night regular, also decided to try her hand at dyeing. She used onion skins to dye some wool yarn, and got lovely results!

We are certainly looking forward to planning some more natural dye days as the weather gets warmer. There's an endless number of materials out in nature that can be used for dyeing, so there's no limit to our experimenting with them.

Photos courtesy of Kate, Hollie, and Anna