Tuesday, 29 March 2011

Leather Lovin'

Two years ago, when I decided to try my hand at bookbinding, I figured my first roadblock would be finding a place to buy leather. I was amazed when a quick Google search pulled up a result just couple a blocks from my house and quickly realized how lucky I was to have such a valuable resource so close by.

Tundra Leather (located at 313 King Street East) has been a staple in the city of Hamilton for decades and a constant in my days ever since my first visit. They have it all – from raw materials and tools (including hides, furs, beads, buckles, hardware, thread, stains, dyes, paints, conchos, decorations, books, videos, creams, finishes and more) to mountains of experience and a sincere desire to share that knowledge.

I'm serious. I can't say enough good stuff. They legit live by the oath that hangs on the wall of the workshop area...

I can't count the number of times I've stopped by with a question, only to have Peter (Peter Grove owns the shop) or Sean (Sean Dalgetty has been his sole employee since 1995) drop everything and spend the next two hours talking me through the many ways I might come at a project, or offer up their own equipment for my use.

But I'm getting ahead of myself. Let's open with a story that's awesome and hugely motivating in terms of knowing that it's possible to turn passion into profession.

Peter started working at the store when he was 12 years old. At the time, it was a Tandy Leather franchise and Peter swept and mopped the floor in exchange for scraps of leather. He eventually learned to tool some of the pre-cut and punched kits Tandy sells and went door-to-door with his own makeshift portfolio - a catalogue cobbled together from cut-out flyer images of the various belts, wallets and purses he knew how to make.

He's since progressed...

In the ensuing decades, Peter worked for Tandy in various capacities. When the company opted to close its Hamilton location in 1991, he bought them out and re-named the shop, Tundra.


Where to begin? First of all, yes that is a snake face hanging by the industrial-strength sewing machine. Secondly, every corner of the shop is equally fascinating and full of similar stories (like what that sewing machine can do to your arm if you use it incorrectly -not pretty- and the fact that Sean has more chocolate stashed in his tool boxes than Claudian Kishi hid during 14 years of the Baby-sitters Club). I could blab to the ends of the Internet.

One of the many great things about Tundra is that there are no pressure sales here. Peter will be the first to tell you the eight tools in the little leathercraft starter kit he sells will allow you to do 90% of the projects you might have in mind. However, if you do want to drop hundreds of billz on new tools and toys (yes please!), Tundra has more than enough merch to oblige you.


 Besides new stock, you can sometimes pick up beautiful antique pieces that satisfy form as well as function. Both Peter and Sean (but especially Sean) have a penchant for turn-of-the-century European tools and I’ve been lucky enough to score a few old-school finds they happened to have doubles or triples of.

These head knives, for example, are about a hundred years old. Sean has dozens in sizes ranging from "deck of cards" to "pool deck," though he admittedly has no idea what you would use the guillotine-scale knife for. He just knew he had to have it.


He meticulously hand-stitches covers for all his tools using the top-notch, decades-out-of-production Irish linen thread from Barbour or Campbell - if you can find either of these on ebay, they seem to trade as good as gold among leatherworkers.

Speaking of - below is a shot of Sean working on a pair of gator-skin cowboy boots. They'll take about 100 hours and he'll hand-sew everything because his stitches put sewing machines to shame.

How much do you want to be able to make your own cowboy boots? Something about that idea is just so romantic. To be able to craft your own kicks and then go off adventuring in them -because surely you wouldn’t be doing anything run-of-the-mill in cowboy boots- knowing that your hands made your travels possible? Unreal (for the record, Sean disagrees with Garance Dore - he says every woman needs a pair of cowboy boots).

In addition to gator skin, Tundra carries creamy vegetable-tanned tooling leather in many weights, snake skin, pig skin, cow hide, deer skin, suede (much of which is Ontario-local) skunk fur and even boxes of foxes! If you think leatherwork is something you might be interested in, definitely swing by the shop. Don't be put off by a pre-emptive perceived lack of skill - there's something about working with leather that is so unlike wrestling with any other textile. I'm a complete disaster when it comes to fabric, but leather has a quality that makes things click.

Don't believe me? Peter and Sean will be more than happy to talk shop with you. Be sure to ask about their five-week tooling workshop. So worth it.

If you're curious to know how exactly leather tooling works, check out my website this Thursday - I'll be posting a little photo tutorial as I work on my entry for the upcoming 61st annual meeting of the Canadian Society for Creative Leathercraft.

Photos courtesy of Amy

Tuesday, 22 March 2011

Pysanky!


Last Monday evening Hollie was kind enough to welcome us around the harvest table in her lovely home to try our hand at traditional egg decorating. Since I was a kid, Easter has been my favorite holiday. There's very little pressure, it comes with spring AND there's chocolate...what's not to love! With spring - and a late Easter, for those inclined - around the corner, eggs were on our brains and had us thinking of the very impressive craft of pysanky (pih-SAHN-kee). Traditionally, Ukrainian woman would create effortless-looking decorative eggs by drawing resists in beeswax on the surface of eggs and successively dipping them into various dyes, layering intricate pattern over intricate pattern. While some of us remembered childhood attempts at this or similar egg dyeing crafts, none of us really knew what we were doing at all. And let us tell you...it's hard! We were not as instantly expert at this as we thought we would be, but it was a lot of fun!

The endeavor began with a trip to The Ukrainian Store in Dundas. When you go in it's hard not to get distracted by all the fresh locally made specialty foods, after all, they boast the "best perogies in town"...a statement that has since been tested by Beehive members and met with much satisfaction. The owners were extremely friendly, fully stocked in every thing we needed and willing to patiently translate the directions on the bright packages of dye.

The supplies needed were candles, dyes, beeswax and kistkas (KIST-kuh - a simple stylus made from a cone of metal fastened to a small wooden dowel with wire). The Ukrainian store has a variety of sizes of kistkas that produce different thickness of line with the beeswax. They even supply electric ones for the expert hand! Dyes can also be made naturally using plants and vegetables like beets. We gathered onion skins to make a yellow dye using just the same method as for fabric dye.


The Hamilton Public Library was full of beautiful books on the subject, and proved invaluable for inspiration.


We mixed the dyes according to instructions and laid out everything we needed to get started. each of us had a little candle in front of us and our egg to decorate. Some times you can blow out the yoke in your egg ahead of time or - as per tradition - leave it to slowly dry out over a few years.

You start by heating the metal part of your kistka until you can easily scoop out a little beeswax, filling the larger open end. With further heating, the wax should run down into the cone, getting ready flow out onto the egg's surface. I found I had to heat my tool often to keep the wax flowing and TOO often we would heat it too much and a large flow of wax would blob out the end of our tool, muddying our attempts at perfect designs! We had to ditch our pride and realize that straight lines and symmetry come with years of practice.


Where the wax is drawn on a resist was made on the egg so that those areas were left white when we dipped them into our first dyes. After you take it out and pat it dry you can add more wax before dipping the egg in a second color, and so on. Wherever the wax has been put on, the last color dyed will stay resisted until the end. We worked from light colors to dark ones. When we finished, we gently scraped or melted off the wax resists revealing all the bright colors we had captured in our squiggly patterns!

I think we were SUPPOSED to be having a meeting too...but I'm not sure we ever got round to discussing anything.

Some of us have since become addicted to the beautiful end results of this craft, and this week for Knit Night we left our needles and hooks at home and filled a whole table with dyes and candles and set to work on some more eggs. I love our folksy (albeit a bit wonky) attempts!


Photos courtesy of Hollie

Sunday, 13 March 2011

Our Roots, Part III: Natural Dyeing

In addition to pickling and knitting, a number of us Beehive members are also interested in natural dyeing. It is a joy to see the beautiful range of colours you can produce using only natural materials.

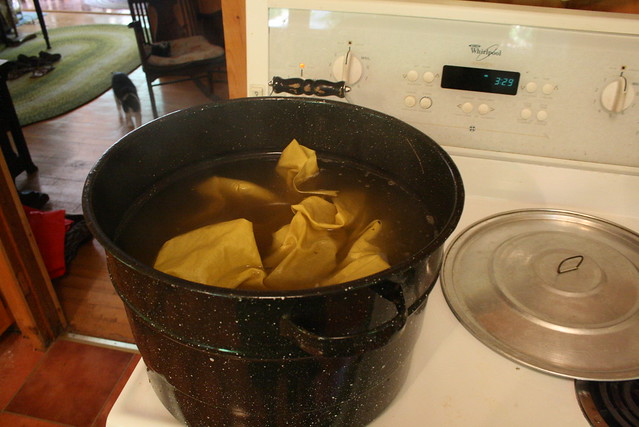
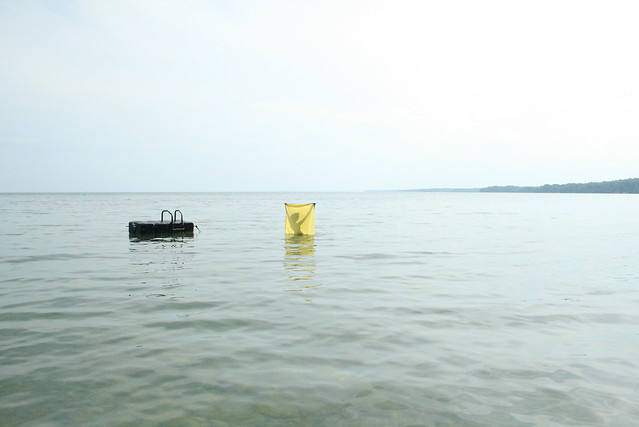
One of my first experiments with natural dyeing was done using golden rod up at my cottage this past summer. Let's just say that having access to a lake is a huge plus! When you get hot and sweaty from letting your plant matter and fabric boil on the stove, you can do the washing out part of the process in the lake while you go for a dip!

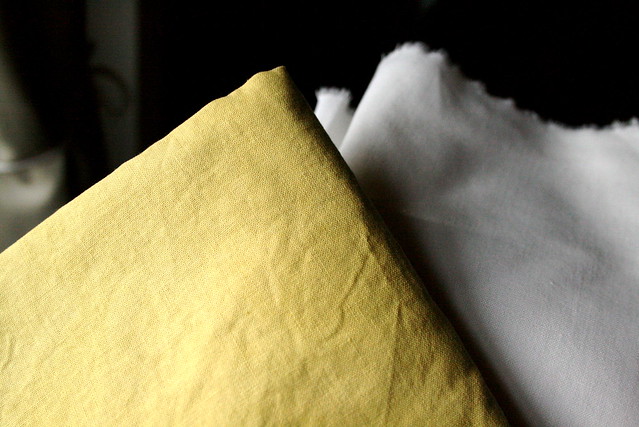
The goldenrod produced a beautiful yellow.

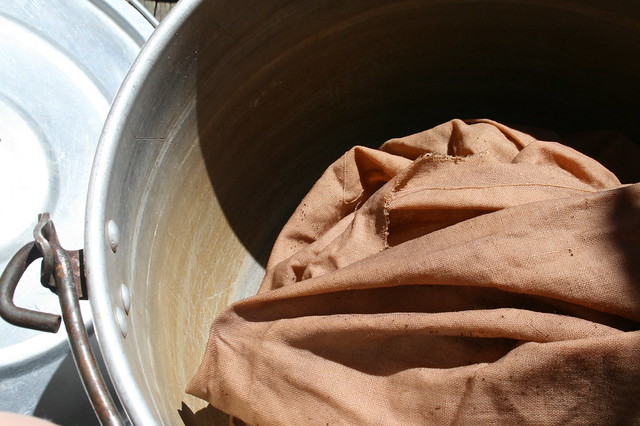
Sumac was my next solo experiment. It produced a lovely brown, but be warned: I think some sort of insect has a tendency to lay it's eggs in sumac. So you might find a whole ton of tiny larvae in your pot when boiling the plant. Kind of gross.

Our first group dyeing session occurred at Thea's house this past fall. I brought some walnuts I'd collected, and Thea supplied cochineal. She got the cochineal from Maiwa, a company located in BC that has a great selection of natural dyes and everything else you need for natural dyeing. And in case you didn't know, cochineal is an insect that lives on the prickly pear cactus that is native to Mexico and some other Central and South American countries. It's ground into a really fine powder for use in dyeing. While it may not be local, it is highly coveted because it produces absolutely gorgeous shades of pink.

We had a lovely time, and our results were great! The pinks and browns that we produced ranged in tone quite a bit, depending on the material that was dyed (protein fibres such as wool pick up dye better than cellulose fibres such as cotton), and whether they were dyed in the first or second use of the dye bath. Using a mordant (like alum, iron, or tannic acid) can also alter and help set the colour.


Anna, a knit night regular, also decided to try her hand at dyeing. She used onion skins to dye some wool yarn, and got lovely results!

We are certainly looking forward to planning some more natural dye days as the weather gets warmer. There's an endless number of materials out in nature that can be used for dyeing, so there's no limit to our experimenting with them.

Photos courtesy of Kate, Hollie, and Anna

Tuesday, 8 March 2011

Our Roots, Part II: Knit Nights at The Brain


I'm quite certain that Wednesday evenings have become my most favourite night of the week. Why, you ask? Because Wednesdays are Knit Nights at The Brain, of course! And it just so happens that I end up meeting only the best kind of folk during Knit Night -- like the majority of the ever-so-crafty Beehive Collective.


Knit Nights began last June, when my friend Melissa and I thought it would be great to facilitate a craft circle in one of the cozy spaces along James St North -- the growing arts district in our fair hometown. We approached one of my favourite hangouts, The Brain, to see if they'd be interested in playing host. Happily, they obliged! We then agreed to meet each Wednesday from 7pm to 9pm, and to put forth an open invitation to all those crafty and willing to join in the fun. Knit Nights have been going fantastically strong ever since.

While attendance varies each week, there are usually a couple of us bees present to keep the circle warm, as well as other talented regulars.

Also, despite it's name, Knit Nights at The Brain welcomes all forms of handicraft, including crocheting, hand quilting, embroidery, tatting, whatever floats your boat. Even our pretty golden poufs were assembled during a Knit Night session!


At last weeks session, both Jenna and Kate learned how to crochet.


With the mother of all craft how-to books at hand, Reader's Digest Complete Guide to Needlework.


and Courtney's expertise...


They proved successful! Voila, granny square!


Meet Tim! Yes, he's knitting a Sackboy. Don't bother asking for the pattern though -- this talented fellow designed it himself, on the spot! Tim is a knitter extraordinaire, and in the months that he's been frequenting Knit Nights, he's made a variety of vegetables, a raccoon, an elephant, miniature hats and scarves for wine bottles... the list goes on and on! The kicker: Tim knits simply because he enjoys the challenge. I haven't once witnessed him working on a project he intended to keep for himself. Amazing!


Our dear friend and co-owner of The Brain, Ms. Heather South (who we happen to love, a lot!), is a total gem and always makes sure to keep us waist deep in delicious treats. This week, tiramisu! Past treats include poppy squares, a plate of assorted cookies and brownies, apple strudel, and custard tarts from Ola's Bakery! Between Heather and the always charming barkeeper, Ken, we're well looked after at The Brain.


As the evening comes to an end, we can always count on a visit from our dear friend, Kieran. A regular since the very beginning, he never disappoints with his highly enthusiastic praise for Knit Night. Now if we can only get him knitting!

If you're interested in a session of friendly crafting, please feel free to drop in and join us! After all, we do keep a stash of spare needles with us at all times for that very reason.

Photos courtesy of Elizabeth